These provisioning instructions apply to the following Polycom Models:
SoundPoint Models:IP321, IP331, IP335, IP450, IP650, IP6000, IP7000
VVX Models: VVX150, VVX201, VVX250, VVX300, VVX310, VVX311, VVX350, VVX400, VVX410, VVX411, VVX450, Use this guide for provisioning a Polycom VVX Desk phone.
| Expand |
|---|
| title | For Poly VVX Desk Phone Running UC Software 5.x.x. or higher |
|---|
|
| Info |
|---|
| For VVX Models: VVX150, VVX250, VVX350, VVX450 |
Create a New ExtensionBefore provisioning a phone to work with NocTel, the device's MAC address must be linked to an extension in the Control Panel. Follow these step to create a new extension: - From the control panel, click on Extensions.
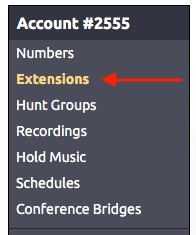 Image Added Image Added
- Click on the Add a New Extension link.
 Image Added Image Added
- Select the Poly (Polycom) IP Phone, from the list, and click Add Device.
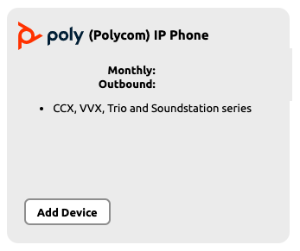 Image Added Image Added - Complete the fields on the new page:
- Device MAC: Enter the phone's 12-digit MAC address. The MAC address can be found on a silver sticker, with a barcode, on the back of the phone.
- Ext. #: Give the extension a distinct extension number not currently in use in your account.
- Line: For all standard applications, leave as 1st
- Extension Name: Enter a descriptive name for the extension.
 Image Added Image Added
- Click Submit to add the new extension.
Setting a New Admin Password on Initial BootOn initial boot of the phone, you are required to set a new admin password. Follow these steps: - Enter the current password “456” in the “Old Password” field.
- Use the directional pad to arrow down to the “New Password” field.
- Choose a password you would like to use and enter this password. NocTel recommends 8675309, as once provisioned, the admin password will be updated to this.
- Use the directional pad again to arrow down to the “Confirm New” field.
- Once confirmed, press the “Enter’’ softkey on the bottom right. The phone will complete booting.
Once the phone has been added as an extension and a new admin password set, complete the following to add the provisioning information: - Press the Home key on the phone's dial pad.
- Use the directional pad to arrow down to Settings. Press the Select soft key to select the option.
- Select Advanced.
- Enter the admin password 8675309, and press the Enter soft key.
- Select Administration Settings.
- Select Network Configuration.
- Select Provisioning Server.
- Use the directional pad to arrow down to Server type, and press the Edit soft key. Change the Server Type to HTTPS, and press the Select soft key.
- Use the directional pad to arrow down to Server address, and press the Edit soft key. Change the Server Address to noctel.com and press the Ok soft key to save.
- Press the Back soft key
- Press the Back soft key again.
- Select Save Congif and press the select soft key. The phone will reboot.
|
...
| Expand |
|---|
| title | For Poly VVX Desk Phone Running UC Software 4.x.x. or Lower |
|---|
|
| Info |
|---|
| These provisioning instructions apply to the following Polycom Models using UC Software 4.x.x or lower: VVX Models: VVX150, VVX201, VVX300, VVX310, VVX311, VVX400, VVX410, VVX411, VVX500, VVX600, VVX1500 |
| Info | If you have not already added the device to a NocTel account as an extension, please visit the Adding an Extension article for |
instruction instructions on adding the device as an extension before proceeding. |
These instructions will allow your Polycom phone to connect to the NocTel network: - When the phone is first powered up it will display a
|
...
- “loading application” screen. Press Cancel.
- On the phone, press Setup
|
...
- and enter the phone’s password. The default is 456.
- Choose Provisioning Server, and press the Select soft key.
- Scroll down to Server Type, press the Edit soft key
|
...
- and arrow right until HTTPS is displayed, and press Ok.
- Below HTTPS, enter noctel.com
|
...
...
- , using the number pad to select the corresponding letters. The star/asterisk key * can be used to add the ''dot"
- When finished, press the OK soft key
|
...
- Press Exit.
- Press Exit again.
- Choose Save & Reboot and press the Select soft key to reboot the phone and save the new configuration.
*Please note that the phone may reboot multiple times.
|
...
Bulk Provisioning
| Info |
|---|
|
| If you are doing a large number of Polycom phones across multiple campuses, it typically make makes sense to set up a location to provision. Contact support for a detailed document explaining how to efficiently deploy a large number of handsets. You might also look at the NocTel DHCP options guide that can assist you with bulk provisioning. |
...
| Port # | Protocol | Purpose |
|---|
| 123 | UDP | Used for NTP to sync device time |
| 5060 | UDP | Used for SIP to initiate calls |
| 10,000+ | UDP | Used for RTP for voice data receipt and transmission |
| 80 | TCP | Used for device firmware |
| 443 | TCP | Used for secure handset remote configuration |
| All UDP | UDP | Used for RTP for voice data receipt and transmission |
Related articles
| Content by Label |
|---|
| showLabels | false |
|---|
| max | 5 |
|---|
| spaces | docs |
|---|
| showSpace | false |
|---|
| sort | modified |
|---|
| reverse | true |
|---|
| type | page |
|---|
| cql | label = "kb-how-to-article" and type = "page" and space = "docs" |
|---|
| labels | kb-how-to-article |
|---|
|
...