Use the following instructions to setup schedules to route calls at specific times to another line or resource, even a cell phone number.
Step-by-step guide
- From the NocTel control panel, click on 'Schedules'.
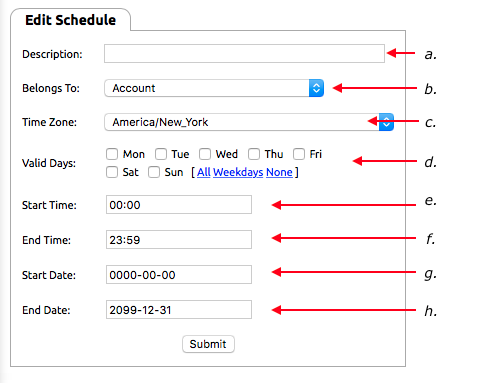
- In the 'Edit Schedule' tab the first field you can update will be the 'Description', name the schedule here.
- The 'Belongs To' drop down will allow you to organize your schedules and assign them for example to the whole Account or an individual extension.
- This field will apply the schedule you build to either the entire account or a specific extension you choose.
- 'Time Zone' specifies which time zone the schedule will follow.
- 'Valid Days' allows you to select which days you want your schedule to be active.
- 'Start Time' is a 24 Hour format field where you can set the daily start time of your schedule.
- 'End Time' is a 24 Hour format field where you can set the daily end time of your schedule.
- 'Start Date' allows you to set a specific date when the schedule should start running, if you want it to run all the time, just leave the field with the default 0000-00-00 entry.
- 'End Date' allows you to set a specific date when the schedule should stop running, if you do not want the schedule to stop, just leave the field with the default 2099-12-31 entry.
- Once you are finished adjusting the settings for the schedule, press submit and the schedule will be in place.
...
With the use of schedules and the “Preform Next Step Only if” action in the inbound behavior section for an extension, call routing can be set to perform different actions based on the time of day. This could be used to have the phone ring during business hours while having it go to voicemail or sent to an answering service for times when a business is closed.
Creating a Schedule
- Log into the NocTel Control Panel
- Click "Schedules” on the left-hand side of the NocTel Control panel.
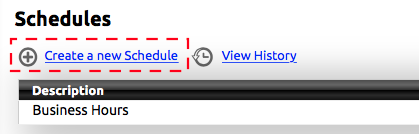
- Click the blue “Create a new Schedule” link at the top of the schedules list.
- In the Edit Schedule page enter the following information:
- Description: give the schedule a distinct name.
- Belongs To: the schedule can be assigned to a specific extension, or left to belong to the whole account. Most users should leave this set to Account.
- Time Zone: the time zone is automatically set to match your accounts default time zone, this can be changed if needed.
- Valid Days: use the check boxes to select the days of the week that apply to the schedule.
- All: selects all days
- Weekdays: selects only Monday through Friday.
- None: deselects all check boxes
- Start Time: enter the time that the schedule starts in a 24-hour format. (Noon is entered as 12:00, 1:00 PM is entered as 13:00, and so on.)
- End Time: enter the time that the schedule ends using 24-hour format.
- Start Date: If the schedule is going to have a start and end date such as a holiday schedule enter the start date here, otherwise leave as is. Enter the date in a YYYY-MM-DD format.
- End Date: enter the end date in a YYYY-MM-DD format if the schedule will end on a certain date, otherwise leave as is.
- Click Submit, to save.
Using Schedules in Inbound Behavior
- Create a virtual extension or open a pre-made extension.
- Click the “edit” link in the Inbound Behavior section.

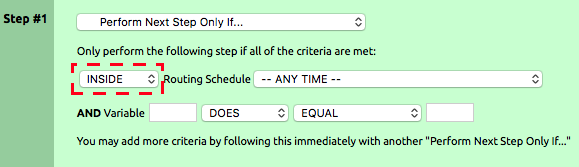
- For Step #1 choose the option “Preform Next Step Only IF…” from the drop-down list. This will change the background color of step 1 and 2 to light green.
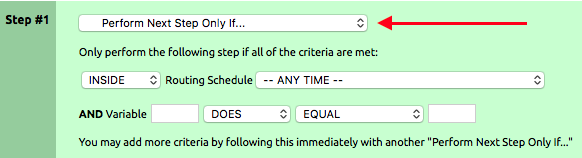
- Inside step one is where the pre-made schedule will be used. Make sure that first box under the text “Only perform the following step if all of the criteria are met:” is set to INSIDE.
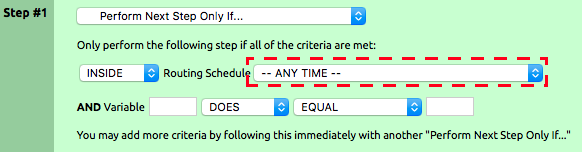
- In the box labeled “—ANY TIME –“ use the drop-down list to select the desired schedule. Leave the other boxes inside step 1 as is unless using them to perform more actions.
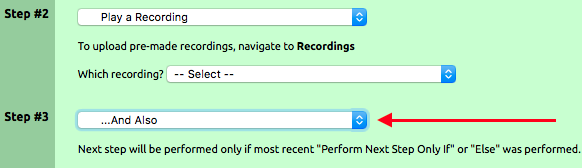
- Set Step #2 to the action you want the call to take if the criteria in Step #1 is met. This could be a step such as “ring a hunt group” or “play a recording”
- Multiple steps can be added to the scheduled action by using the action “… And Also” after the first step.
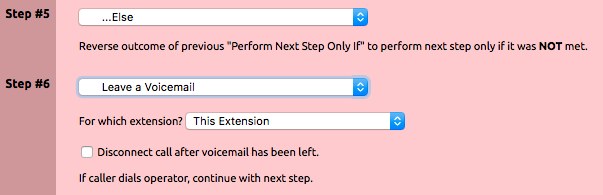
- Once the actions have been set for what should happen during the schedule, set what should happen outside of the schedule with the action “…Else”. The “…Else” action should be used after the last action set within the green area. Actions that are set within the else section will only happen if the above criteria in the green section are not meet. Actions will appear light pink in color.
- Click Submit, to save.
Printable PDF: Time of Day Routing and Schedules.pdf
Related articles
| Content by Label | ||||||||||||||||
|---|---|---|---|---|---|---|---|---|---|---|---|---|---|---|---|---|
|
...