...
- Create a virtual extension (Control Panel > Extensions > Add a New Extension > Add Virtual).
- Name the virtual extension and assign an extension number.
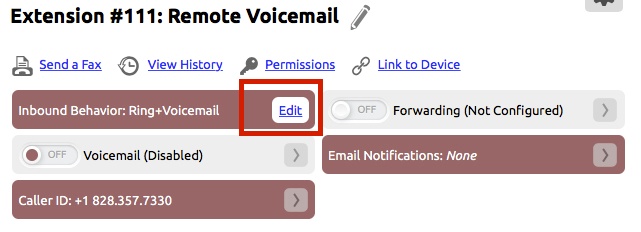
- Click the Edit button in the Inbound Behavior area.
- Set Step #1 in the drop down list to be Manage and Listen to Voicemail.
- Select Prompt Caller for Extension in the drop down menu for, For which Extension?
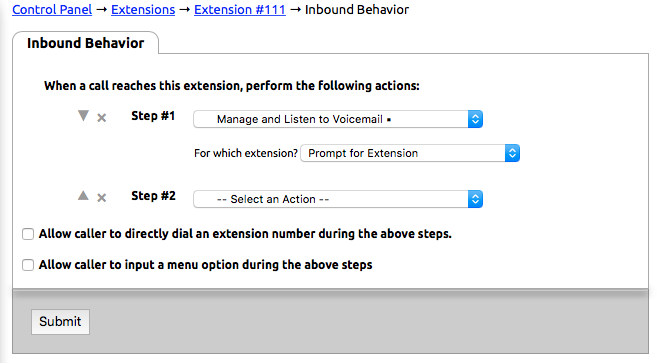
- Click Submit to save.
- Click Numbers on the left-hand side of the Control Panel
- Select the number from the list that will be used for remote voicemail access.
- In the drop down list next to Route to Extension: select the extension that was created for handling remote access.
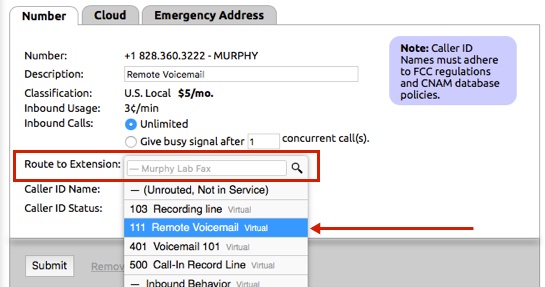
- Click Submit to save.
Option 2: The number used to access voicemail remotely is shared with a number that is used for other calls.
- Create a virtual extension (Control Panel > Extensions > Add a New Extension > Add Virtual).
- Name the virtual extension and assign an extension number. (The extension must have an extension number in this setup)
- Click the Edit button in the Inbound Behavior area.
- Set Step #1 in the drop down list to be Manage and Listen to Voicemail.
- Select Prompt Caller for Extension in the drop down menu for, For which Extension?
- Click Submit to save.
- Click Extensions
- From the list, select the virtual extension that controls inbound behavior/routing for the number that will be used for remote voicemail access.
- Click the Edit button in the Inbound Behavior area.
- In order for the inbound caller to be able to enter the extension number of the remote access extension, the inbound behavior must have a step that will allow the user to input data on the phone. An example of a setup that would allow for data entry is Play a Recording.
- Check the Allow caller to directly dial an extension number during the above steps listed below the action steps in the Inbound Behavior editing page.

- Click Submit.