Use this guide for provisioning a Polycom VVX Desk phone.
Models
For VVX Models: VVX150, VVX250, VVX350, VVX450
Create a New Extension
Before provisioning a phone to work with NocTel, the device's MAC address must be linked to an extension in the Control Panel. Follow these step to create a new extension:
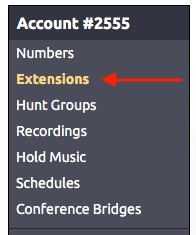
- From the control panel, click on Extensions.
- Click on the Add a New Extension link.

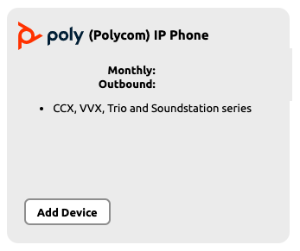
- Select the Poly (Polycom) IP Phone, from the list, and click Add Device.
- Complete the fields on the new page:
- Device MAC: Enter the phone's 12-digit MAC address. The MAC address can be found on a silver sticker, with a barcode, on the back of the phone.
- Ext. #: Give the extension a distinct extension number not currently in use in your account.
- Line: For all standard applications, leave as 1st
- Extension Name: Enter a descriptive name for the extension.

- Device MAC: Enter the phone's 12-digit MAC address. The MAC address can be found on a silver sticker, with a barcode, on the back of the phone.
- Click Submit to add the new extension.
Setting a New Admin Password on Initial Boot
On initial boot of the phone, you are required to set a new admin password. Follow these steps:
- Enter the current password “456” in the “Old Password” field.
- Use the directional pad to arrow down to the “New Password” field.
- Choose a password you would like to use and enter this password. NocTel recommends 8675309, as once provisioned, the admin password will be updated to this.
- Use the directional pad again to arrow down to the “Confirm New” field.
- Once confirmed, press the “Enter’’ softkey on the bottom right. The phone will complete booting.
Entering Provisioning Information
Once the phone has been added as an extension and a new admin password set, complete the following to add the provisioning information:
- Press the Home key on the phone's dial pad.
- Use the directional pad to arrow down to Settings. Press the Select soft key to select the option.
- Select Advanced.
- Enter the admin password 8675309, and press the Enter soft key.
- Select Administration Settings.
- Select Network Configuration.
- Select Provisioning Server.
- Use the directional pad to arrow down to Server type, and press the Edit soft key. Change the Server Type to HTTPS, and press the Select soft key.
- Use the directional pad to arrow down to Server address, and press the Edit soft key. Change the Server Address to noctel.com and press the Ok soft key to save.
- Press the Back soft key
- Press the Back soft key again.
- Select Save Congif and press the select soft key. The phone will reboot.
Bulk Provisioning
Bulk Provisioning
Ports Used by Polycom & NocTel
The following table below lists and describes the TCP and UDP ports used by Polycom phones and the NocTel system. Blocking any of these ports may result in the inability to place calls and other symptoms that will affect the use of Polycom phones.
| Port # | Protocol | Purpose |
|---|---|---|
| 123 | UDP | Used for NTP to sync device time |
| 5060 | UDP | Used for SIP to initiate calls |
| 80 | TCP | Used for device firmware |
| 443 | TCP | Used for secure handset remote configuration |
| All UDP | UDP | Used for RTP for voice data receipt and transmission |
Related articles